The Creative Practice and a Shifting Definition of “Pefect”

Up close image of leaves appliqued on gray t-shirt.

The Fall

A few days before New Years 2023, the speed hooks on my winter boots connected and locked together. In a quick second, I was flat on the sidewalk, my dominant right hand tucked under my chin to break the fall. Over the next couple of minutes, I took stock of the situation and realized it could have been so much worse. Only my hand throbbed. I would recover. I was grateful.

During a week when many people are taking some time off, I was fortunate in that the doctors I needed to see were available and close to home. A few hours later, x-rays confirmed my hand was indeed broken. It was put in a splint… A couple of days later I graduated to a cast.

Shifting My Definition of “Perfect”

In the weeks after the fall, I learned to do tasks with my non-dominant left hand. Sometimes the outcome was surprisingly positive: Everyone agreed my handwriting was now legible! Sometimes my efforts left me less than pleased: My attempts at stitching with my left hand yielded a new style that was quite different from the past. My stitches had always been uniform in size and proportions, precise. My new stitches were anything but this. I folded up projects that were in process and put them away. They would have to wait until my hand was healed and I could make “perfect” stitches again.

The projects did not stay put away for long. About a month later, I realized my creative process had to shift along with how I defined “perfect” and “good”.

Recovery – Both of My Hand and My Creative Practice

Over the months ahead, I began to focus on sketching more and more, especially designs where those neat, uniform stitches seemed less of a requisite. And, I began to stitch again with an expanded understanding of what makes for a “good” stitch and with an expanded repertoire of stitch looks.

These days, with my hand continues to make incremental improvements. My stitching style continues to evolve. Some days that uniform stitch is back; other days, the style is more loose and improvised. All our good.

Our creative practice is just that, a practice. One that, ideally, will continue to evolve and grow as our circumstances change, curiosity takes us in new directions, and our skills deepen and expand. Often the impetus for a shift occurs when we least expect it and, often, in situations beyond our control. Instead of putting a creative practice on hold for a year, I learned, at the end of the day, to embrace what is and use it as an opportunity to explore new directions and expand my definition of “perfect”.

A Season of Exploring, Playing and Making

Collage of Projects Completed This Summer and a Book Read

The past few months, I’ve spent a fair amount of time exploring, playing and making. Not venturing far on most days, at least not physically.

It was a beautiful, long-lasting spring here in Northern Illinois this year – mild temps in the day, cool nights, rain at (mostly) the right times and in the right amounts. Magnolia trees actually held their blossoms for an extended period. Beautiful. Would we slide into a summer that was just as perfect?

With the start of fall, we now know the summer has been a challenging one: drought conditions in many parts of the country and devastating rainfall elsewhere are reminders of a changing climate; continued health worries with the delta variant…

With all that is going on out in the world and, perhaps, close to home in our daily lives, a creative practice for expressing where you’re at in all of this can give shape to your thoughts, ideas, solutions… In other words, a creative practice can act as an elixir of sorts that provides much-needed breathing space for processing and making/doing.

Key to my creative practice is making time to explore and play. Over the last few months, here’s where the journey has taken me…

Reading

Escaping into books is something I’ve done since childhood. This summer, I closed each day with reading in bed for a bit. Not light summer reading mind you. Instead, I went for some pretty intense stories that covered all the emotions but at the end of the day, shine a light on that which is most important and serve as a reminder to live into each day fully. Two favorites – Between Two Kingdoms: A Memoir of a Life Interrupted by Suleika Jaouad and Finding Freedom: A Cook’s Story; Remaking a Life from Scratch by Erin French. Find both at your local library or independent bookstore. I am currently reading Pastoral Song: A Farmers Journey by James Rebanks.
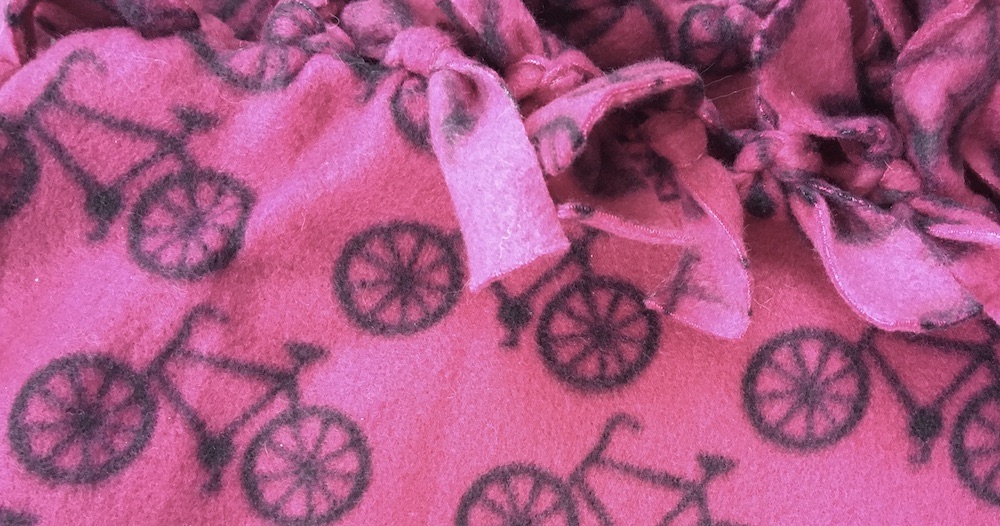
Knitting

For some reason, I love to knit in the summer – and, not light airy things. More like wool knits to use in the coming winter months. Last summer, I knit up a half-dozen scarves or so for Christmas gifts. Continuing on my mission to clear out my yarn stash, this year I tackled a sweater pattern. I look at the finished piece now with amazement – because I actually knit a whole sweater and finished it! (Many thanks to my wonderful, talented neighbor who had a lot of patience!) Using a simple pattern and focusing on each piece at a time kept it fun (for the most part), rather than overwhelming. I chose a classic sweater design (“Great Tunics,” View 2) from 25 Gorgeous Sweaters for the Brand New Knitter by Catherine Ham. Find it a the library or used on Amazon or at yard sales.
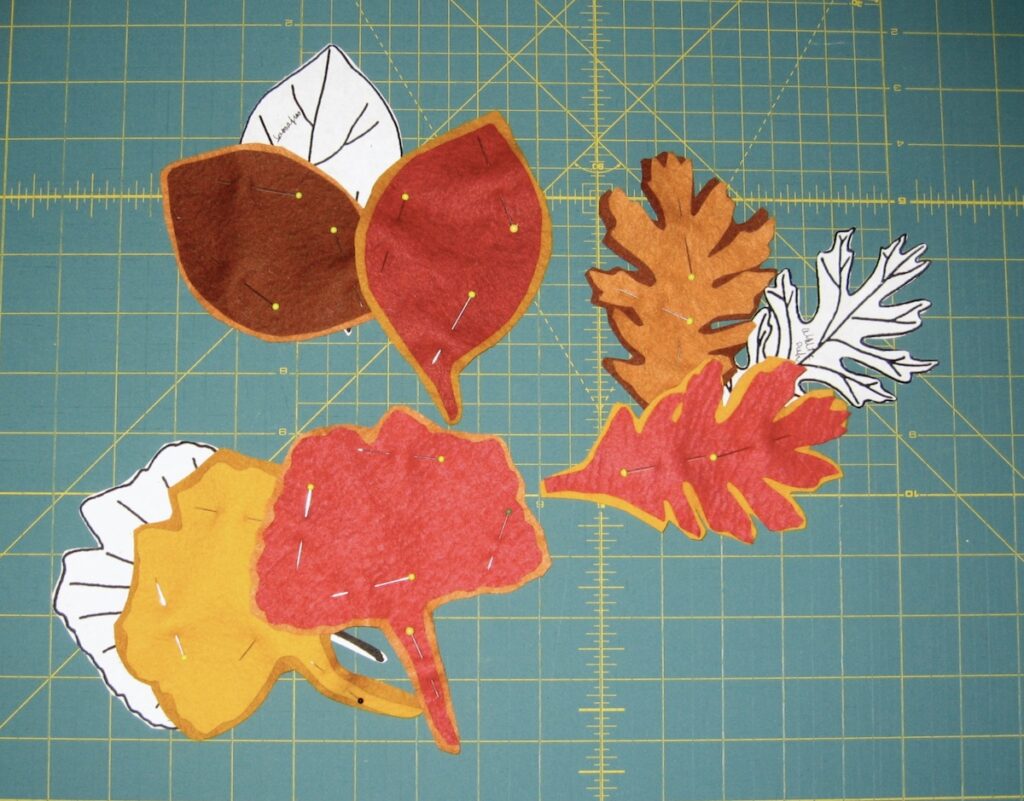
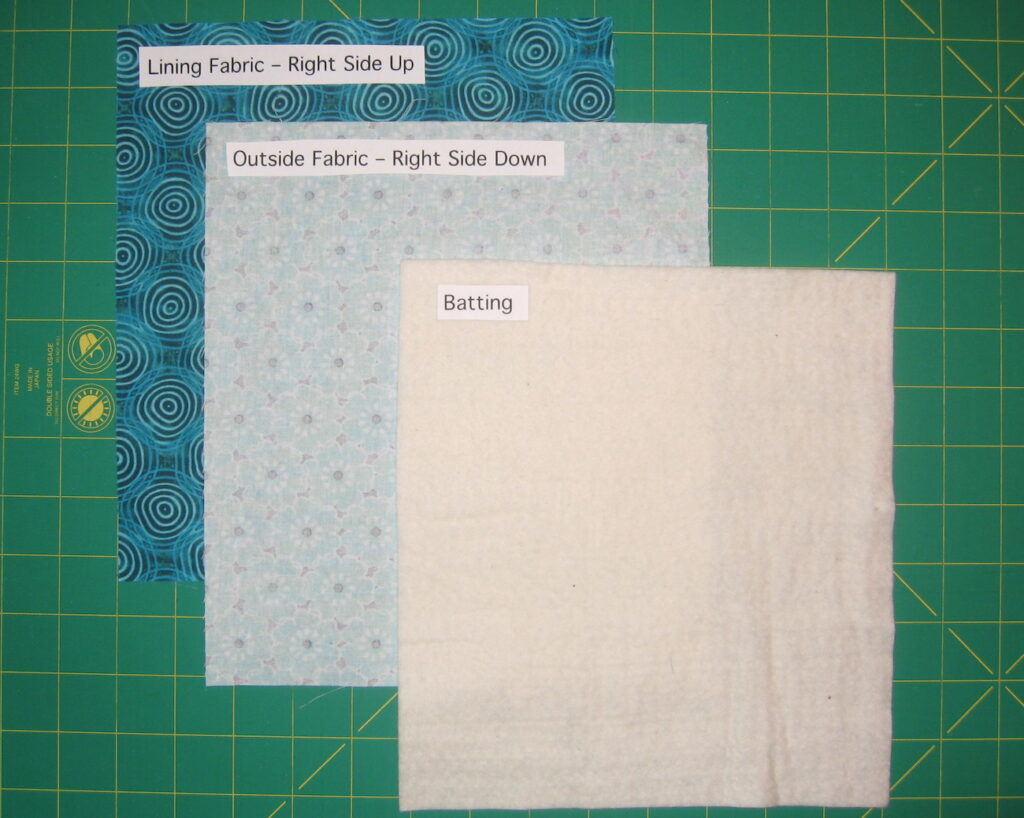
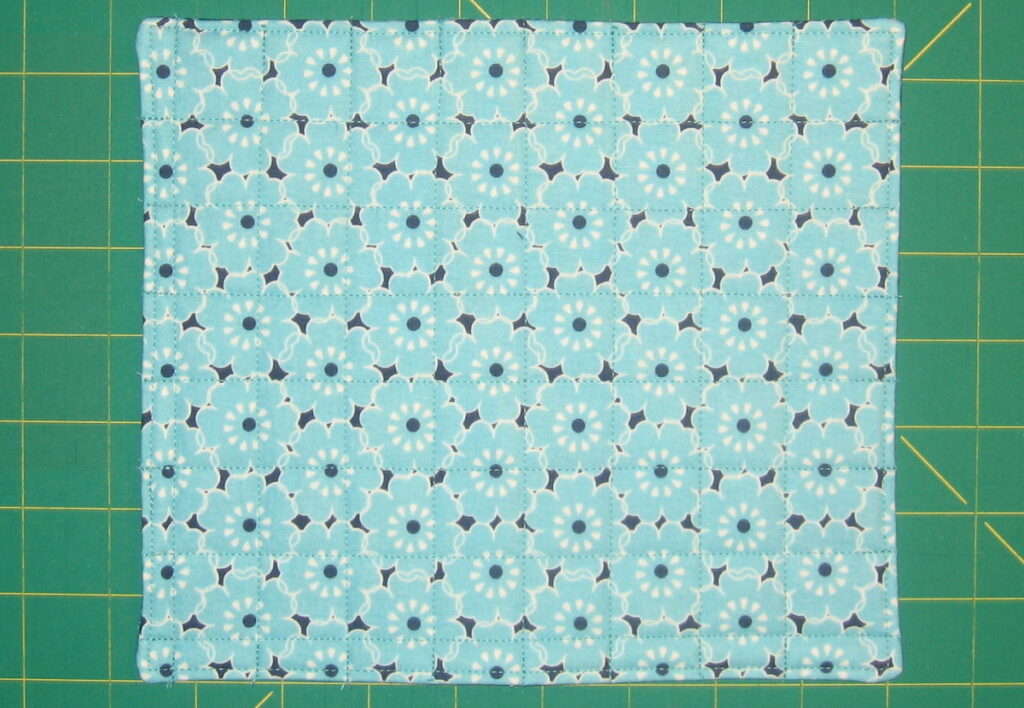
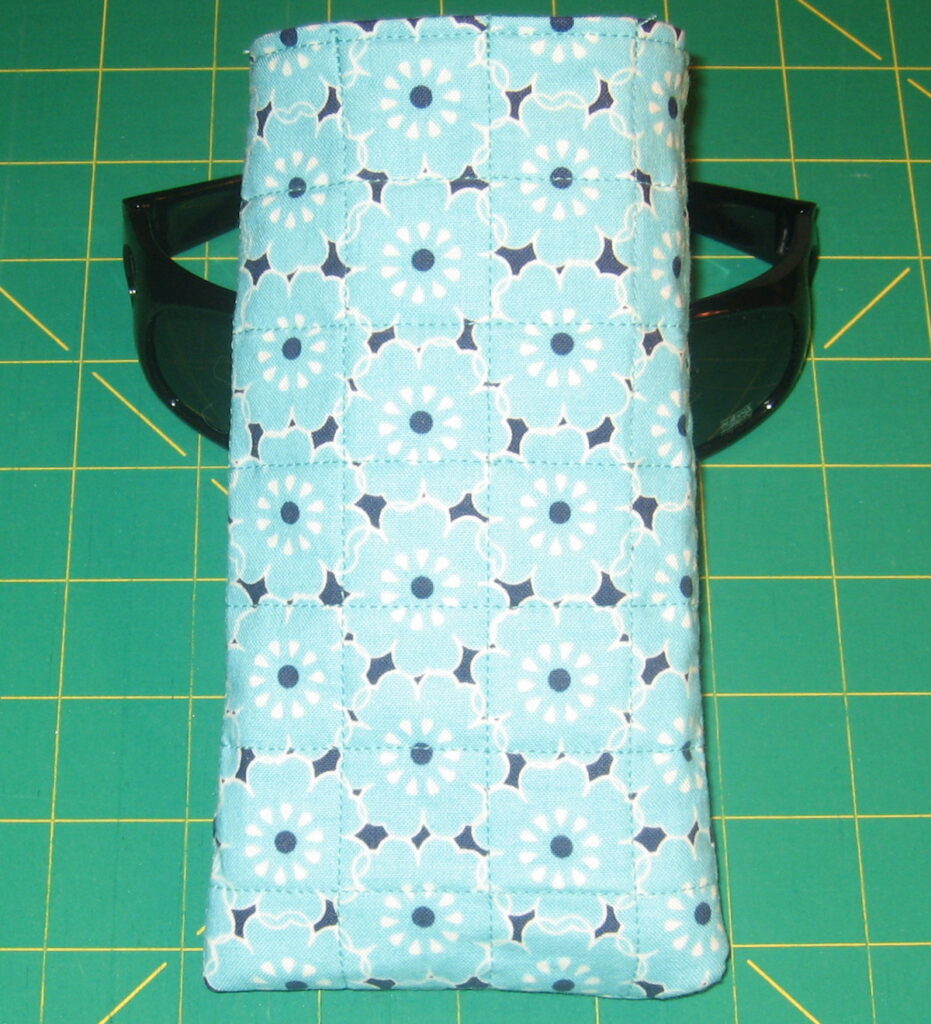
Quilting

A trip to the Art Institute of Chicago was all about finding inspiration. First stop was the Bisa Butler exhibit, “Bisa Butler: Portraits.” The quilts were breathtaking and the story behind each one a glimpse into Black life. This field trip also made me realize just how much I have missed going to museums during the pandemic.

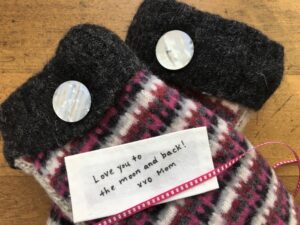
Dyeing with Plants and Embroidery

I took an online steam-dyeing class from the folks at Lady Farmer. After the class, I spent a few evenings embellishing the project with embroidery. Since then, I’ve dyed small amounts of fabric using kitchen scraps and plants from our yard. So cool!

Cooking

No doubt about it, by late spring, we had fallen into a menu rut at our house, cycling through the same recipes each week. With summer, we had to change things up to take advantage of the vegetables coming out of our very small garden and the CSA (Community Supported Agriculture) box arriving each week. I dug into cookbooks and began experimenting with new recipes. One favorite book – Food52 Mighty Salads: 60 New Ways to Turn Salad into Dinner. A favorite soup recipe (that we modified based on what was on hand – like substituting spinach for the chard) – was this Moroccan Red Lentil Soup with Chard from the Feed Me Phoebe blog.

Gardening

At this point in the season, I’ve come to terms with the fact that the yard is what it is. My focus has shifted to laying out plans for next year. Plans that include expanding the garden to – hopefully – get rid of the lawn (and the lawn mower) within the next couple of years. My preliminary sketches on graph paper look somewhat like a quilt design!

Mapping Out Places to Explore in the Coming Months

Making time for exploring and playing, in my opinion, is just as important as time spent making. Map out your own path for exploring and playing in the months ahead. Your map can take many forms but ideally reflects where you are at right now. Young kids? Break habits and visit a new park or walk down a different street. Not feeling a 100%? How are the trees outside your window changing right now? What else do you notice this time of year? Work dominates life right now? Find a good book to really sink into, or take a few minutes to explore a favorite museum’s online collection. Yes, in person is more fun, but sometimes it’s just not possible.

Follow your interests to explore and play. Then, when the time is right, take all this inspiration into your studio* and make/do. Make beauty. Do good.

*The word “studio” is used to mean wherever you go to make all those ideas. A place where the energy shifts for a bit of time as you sink into a project and others (ideally) recognize that you are “in the zone.” For many years mine was borrowed space in a small room that also functioned as homework space and home office. When I lived in a studio apartment in Chicago, it was the breakfast bar that divided the kitchen from the living/sleeping area.

Easing into Spring and Planning a Dye Garden

Flower seed packets

With more daylight and warmer temps, I am ready to get out in the yard to do spring clean up and begin putting in place all the garden ideas I’ve dreamed up over winter. Here in the Midwest, though, we often slip back into winter for a day here and there in March and April. Like the last few days. So, I’m reminding myself to slow down and ease into spring.

One of the first projects on my list is to plant a small dye garden. Plants I’m including are Zinnias, Bachelor’s Buttons, Clary Sage, Marigolds, and several other plants already in the perennial bed. While it is very much an experiment this year from beginning to end, I feel like even if the dyeing process doesn’t produce colors quite as I had hoped, they will still be interesting.

If you are contemplating a dye garden this summer, check with your local hardware or garden center for seeds. A couple of my favorite online sources for seeds and information include Seed Savers Exchange and Floret. With so many people planting gardens these days, I have found local stores to have the most selection at this juncture. That said, online sources are restocking as they can.

Another benefit of growing these flowers – fresh-cut flowers for inside the house through fall and last minute bouquets to drop off with friends and family!

Follow along on Facebook and Instagram – @YvonneMaloneStudio – to see photos of how this project unfolds in the coming months.

Hidden Messages

Handmade cotton clothing label

You probably know that feeling of surprise when you find a treasure tucked away in the pocket of a jacket that you’ve not worn for several seasons. Like a rock picked up at the beach or on a family hike. You pull it out and remember the day – who you were with, the conversation, the relaxing feel of just wandering. It makes you smile – and you might just decide to leave it there as a reminder of what is most valuable.

From time to time, I’ll write down a quote and tuck it away in my planner. The quote often brings me back to center when I’ve been going a hundred miles an hour. I think of these items we randomly collect and drop into a pocket, a zippered pocket of a purse… as hidden messages to ourselves.

You may have seen a hidden message of sorts in handmade garments in vintage stores or even stitched a label into garments and accessories you’ve made. A message that reads something like “Made Expressly for You by the maker’s first name.” How wonderful to slip the garment on knowing the maker stitched in a lot of warmth and love as they knitted the sweater as a birthday gift, a back-to-school outfit, or simply because.

The coat Jill Biden wore on the evening of President Joe Biden’s Inauguration included a quote embroidered into the lining: “Tell me and I forget. Teach me and I remember. Involve me and I learn.” The quote, from Benjamin Franklin, is meaningful to her as an educator. And, it was something to “carry with her” on the historic day.

Quiltmakers often include a label on the back of a quilt with their name and the date. When working on a commission, I ask clients if there is a sentiment they would like to include on a separate label. Many provide one, especially if the quilt is to be a gift.

So, here’s a small project – or a big one, depending on how you run with it! Make some labels to stitch into your own clothes, your child’s, a partner’s… 

  • Include a family motto, a simple drawing, a quote, or a personal sentiment.
  • Decide on whether you will use fabric markers or embroidery to make the design.
  • Play with cotton fabric scraps, pieces of felt, buttons, and ribbon as you design your label(s). 
  • Consider the orientation of the label before stitching. For example, do you want the wearer to be able to view it when wearing the garment or just when they slip it on.
  • Select materials and determine size based on where you want to stitch the label and how it will be washed. For example, avoid anything scratchy that will be stitched in at the neckline.
  • Test the materials you are using before sewing into the garment/accessory to make sure they are colorfast. This is especially true for fabric markers – it’s best to make sure the ink doesn’t run before the label is stitched into a favorite sweater.

The label pictured above is made from 100% cotton fabric, a leftover scrap from another project. The edges were turned under and stitched in place using a running stitch. When I tack it down, I will incorporate a bit of ribbon.

Have fun!

Handmade cotton clothing label laying on mittens

Keeping it Simple in the New Year

Potholders made with colorful loops and loom

We are starting a new year with the same concerns and challenges of 2020. In years past, I have kicked off the new year with an ambitious studio project – a large bed quilt, an intricate embroidery piece, or a series of projects for upcoming classes. This year I decided to start simple, knowing the larger, more complex projects are around the corner.

To begin, I dug into some of my daughter’s crafting supplies from years ago and found several yards of blanket fleece. In about 90 minutes, I had made a tied edge fleece blanket, start to finish, for friends’ 3-year old child. Perfect for cuddling under after a day of play in the snow. A straight-forward, simple project. You can find instructions here.

Recently, I also found my daughter’s potholder loom and some leftover loops (from hers and mine!), so in the days leading up to 2021, I also made a few potholders. Again, simple, useful and done in less than an hour. Another plus – I’ve stashed several away to pair with tea and baked goods to give away to friends and family. If your potholder loom is long gone, check with your local art/craft store to see if they have any in stock. If not, here’s a link to Purl Soho’s kit. Both the potholders and the fleece blanket projects are fun to do solo and with kids.

So, as we enter another roller coaster year of experiences and emotions, take on those big, ambitious, boundary-pushing projects for sure but intersperse some smaller ones in there as well. This practice also applies not just to what you are making but also to what you may be doing at work and in your community: )

Happy making in the year ahead ~

Purple Fleece Blanket with Bicycle Motif

Martha Mae-A Favorite Destination for Art Supplies and Inspiration

Unwrapped package with notecard

Once in awhile, you walk into a store and feel transported to another world. Martha Mae: Art Supplies & Beautiful Things is one such place.

Last winter, about this time, I discovered Martha Mae in Chicago’s Andersonville neighborhood. Though not large, my husband and I spent well over an hour in there ticking through our holiday shopping list and finding gifts for artists and those who haven’t picked up a box of paints or sketchpad in years. We were not about to leave until we had looked, touched and tested our way through the store – yes, “tested.” Trying to decide between different pencils, we were invited to try them out at the back counter. Martha Mae, a Cavalier King Charles spaniel and the store’s namesake, was curled up in his basket sleeping away despite a bustling store – just so darn cute!

Flash forward from last year to this and, like so many other businesses, Martha Mae was forced to close its brick and mortar store because of the pandemic. The store has moved 100% online.

A couple of weeks ago, I popped onto the website to make a couple of gift purchases, and the box arrived a few days later. When I opened it, I was immediately wowed by all the care they had taken to package my treasures (eco-friendly, too!). For a few minutes, it was as if I was standing at the back counter waiting for my purchases. Tucked in a small bag were several items including a small watercolor of a kumquat with a hand-written thank you note on the back. In this era where we hunger for in-person gatherings, these little touches were so appreciated.

On this small business Saturday, shop local and be sure to check out stores that may have moved from Main Street to just online. And if you are looking for art supplies or a beautiful gift – especially for that hard-to-buy-for-person – check out Martha Mae. Oh, and my favorites at the store… Beam Paints, all the inks, and the Moon Calendars.

Celebrate Fall with Felt Leaves

Felt leaves on white cake stand

Fall is my favorite season – the crisp temperatures, beautiful colors, warming foods like hearty stews and ginger cookies. And, a reminder to spend as much time outside as possible before winter arrives with its plunging temperatures!

To extend the fall season in your home and capture the beauty of the season, whip up some felt leaves that make use of leftover scraps from past projects. They look great placed under a table centerpiece – think ceramic pumpkins, a glass candle holder, or a vase of branches gathered on a walk. Other ideas:

  • Add a magnet to the back of the stitched leaves and stick on your refrigerator – then rearrange often!
  • Stitch the leaves to a ribbon using a small tacking stitch and string up on the fireplace mantle or a bookshelf.
  • Cut a rectangle from burlap or heavy canvas, arrange the leaves in a random pattern, and stitch in place using a tacking stitch in several places on each leaf. Then, hang on the front door or someplace in the house where you can enjoy.

Here’s the how to:

Step 1: Collect felt scraps in fall colors – oranges, reds, browns, yellows greens. Then, get ready to play with the color, shape, thread color and stitching.

Step 2: Sketch out an assortment of leaf patterns based on trees that are real or imagined. Or, download leaf coloring pages from the Internet and use these as your patterns.

Step 3: For each leaf, cut out two sizes. The larger one should be about 1/4″ bigger all around than the smaller one. Enjoy the process of playing with the colors – make some leaves that high contrast, others with less – to see what you like best. Creating a mix of leaf combinations will help keep it interesting (IMO).

Step 4: Place the smaller leaf on top of the larger one in each leaf pair and pin in place to hold while you are stitching.

Step 5: Stitch the two leaves together to emphasize the overall shape and vein pattern. You have many options here for stitching: hand stitching using different embroidery stitches or a simple running stitch; machine stitching that takes advantage of your machine’s capabilities or a simple straight stitch (as I did here). If you are hand stitching the leaves together, you can use embroidery floss, perle cotton, or heavy sewing thread. NOTE: You can use a pencil to lightly mark your stitching pattern on the felt so that you can cover it with your stitches. Alternatively, use the edge and curve of the leaf to inform the placement of your stitches.

Step 6: Have fun, use and enjoy!

Sharing the making experience with others:

Here are some ideas for adapting the project if you are short on time or materials, have a little one who wants to participate in the leaf-making fun…

  • Glue the leaves together, then “make stitches” with a Sharpie.
  • Use a big needle and big stitches to hand sew the leaves together.
  • Divide the steps up to match each person’s age, skill level and/or interest.
  • Use heavy card stock or construction paper instead of felt. Then, using markers, draw the stitching pattern on the leaves.

Unplugging to Create and Explore

Brown and Orange striped knitted scarf

Election Day seems to be a good day to post about the break I’ve taken in this space, especially since I’m trying to tune out the news for at least part of the day. So, about that break…

My studio is where I go to create, express ideas, find peace, and get lost in the flow. Occasionally, it feels more like work than play – usually a sign that my creativity is tapped out. So, I took a break – or, as I like to say, cleared the table for awhile. Critical was unplugging from social media and engaging in activities that I find restorative:

  • Playing with color and texture. Finding a box of yarn for a sweater that I know I will never knit started me down this path. Now, 4-1/2 scarves later, I’ve got some ideas for future quilts and embroidered pieces – and gifts for my family.
  • Sketching found objects. When out on walks, I like to pick up leaves, acorns and other items lying on the ground. When the objects are too big or stationary (like tree bark), I snap a picture and then begin sketching at home. My sketches are not how you might see it, but they are as I see and interpret the object. Again, more ideas going into the creative tank.
  • Breaking out of a cooking rut to make some pretty terrific meals. There have been a couple of flops so not all has been perfect but I am learning and my taste buds are quite happy. The meal we are still talking about: Zuni Cafe’s Roasted Chicken with Bread Salad. I’ve never eaten at this San Francisco restaurant but I know exactly what I’d order!
  • Connecting with family and friends via phone, Zoom, or in person. It is amazing how much your schedule opens up when you unplug. All of sudden, you have a bit more time – and energy – to connect with people one-on-one. One blustery, chilly day we sat around our friends’ table to enjoy a great meal and conversation, then watched My Octopus Teacher. (We first checked to make sure we had been following CDC guidelines when it comes to social distancing.)
  • Steeping myself in nature. Walks, sitting outside – even with a blanket wrapped tightly round – or just opening a window and taking a deep breath in to connect with the natural world.

I am working on making these activities daily/weekly habits to keep my creative tank from becoming depleted again. I’ve also established more clear boundaries around social media – checking in once or twice a day for 30 minutes or less and unplugging during the weekends. Exceptions will happen but that’s what they will be, not the norm. Focusing and prioritizing those things that matter most – like family, friendships and my creative practice – will get the most attention.

So, on this big day, go vote if you have not already. Next, unplug to find a few minutes to slow down and do what restores you on a regular basis. Then starting at home, create and do to build a better world for today and for future generations, a world that unites, is kind and inclusive, is built on science and truth.

Transforming Envelopes into Art

Quilt block stitched to white Tyvek Envelope

If you look at a Tyvek mailing envelope up close, you see what looks like iridescent fibers and feels like a cross between paper and cloth. Manufactured by DuPont, Tyvek is a non-woven material, and according to their website, is made of “100% high density polyethylene fibers randomly laid and compressed to form a remarkably tough printing substrate that is ideal for applications where durability and tear resistance is of prime importance.” You’ll find it in building materials, envelopes, reusable bags, building signs…

I like Tyvek for its water-proof properties, especially when mailing something important (like fabric or taxes) And, I feel guilty every time I send or receive something in a mailer, even though DuPont says it’s a recyclable material.

So, when a package arrived the other day in a Tyvek envelope, I decided to extend its life in a new direction: Using it and few scraps of fabric from an earlier project, I made a small quilt block, then stitched it to a piece of Tyvek. I wrote a get-well message on the back and will mail it to a friend tomorrow.

Here are the steps:

  1. Gather some fabric pieces and a used Tyvek envelope.
  2. Design your quilt block. Consider incorporating envelope seams, stamps, and the postage mark into the design. Also consider how you intend to use the finished piece. For example, will you write a message on the back and mail to a friend, tack it on your inspiration board…
  3. Cut out your pieces, allowing for a 1/4″ seam allowance. For the one-patch quilt pattern in the photo, I cut 4 squares (2 from each fabric) measuring 2″ x 2″.
  4. Stitch the block pieces together (1/4″ seam allowance) using a needle and thread or sewing machine.
  5. Stitch the block to a piece of Tyvek. Use tape to hold the block in place while stitching, removing it before the needle pierces the tape. This prevents the needle from getting gummed up. (Note: Pins will leave a permanent hole in the Tyvek, so tape works best.)
  6. Use a longer stitch length – or decorative stitch to add a border around the block. Be sure to use tacking stitches at beginning and end so that the stitches don’t pull out.

Several additional notes to keep in mind:

  • Do not iron the Tyvek – only finger press – because it will melt if your iron is hot enough.
  • You can paint Tyvek with acrylic or fabric paints. Just paint, wipe off any excess and then let dry before using in your project.
  • If you are writing on the back, test on a scrap of the envelope first to make sure the ink does not soak through onto your block – or that your message does not smear. I wrote on the back using a Uni-Ball Signo fine point gel pen (0.28mm tip).

To see other ideas on how to transform mailers into something both useful and beautiful, check out Reinvention: Sewing with Rescued Materials by Maya Donenfeld, available through your local bookstore and, hopefully, library.

Sunglass Case – Keep it Simple or Make it Fancy

embroidery pattern sketched on sunglass case

The beauty of being a maker is that you get to decide whether to pull out all the stops on a project or keep it simple. It’s all in the design choices you make along the way. Even for a simple sunglass case. Decisions such as:

  • Fabrics – cotton, washable velvet, felted wool…
  • Technique – hand sewing or machine
  • Embellishments (or not) – embroidery, applique, beading…
  • Thread – silk, embroidery floss, sashiko thread…

The instructions below for making a sunglass case were first posted on my previous blog in 2012 – kids were at home and time was limited. I needed a new sunglass case like yesterday so I went with the 2-hour version, nothing fancy at all. It’s a bit worn now but still in use. For the next one, I’m upping my game a bit with the hand-drawn, wavy line design pictured at the top of this post.

So, you decide – simple or fancy, then get making!

Step 1 – Cut out two pieces of fabric – one for the lining and one for the outside – each measuring 9-1/2″ x 8-3/4″. If you have a fabric sunglass case that works for you now, just measure it, adding 1/2″ for each seam allowance.

Step 2 – Cut out one piece of batting, slightly smaller than the fabric pieces. For my case, I cut the batting 8-3/4″ x 8-1/4″.

Step 3 – Make the quilt sandwich in the sequence indicated in the image below. Lay each cut piece on your table, smoothing each one so that there are no wrinkles. Next, pin the layers all together to hold them in place while you stitch.

Quilt Sandwich labeled

Step 4 – Stitch around the edges using a 1/2″ seam and leave a gap of about 4″ along one edge for turning. If you have a walking foot for your machine, use that for best results. When finished stitching, clip the corners, turn right-side out, and press. Stitch the opening closed using your sewing machine and stitching close to the edge.

Step 5 – Quilt by hand or machine. Experiment with different quilting stitches to see what you like best.

Quilted Sunglass Case Project

Step 6 – Fold the quilted piece in half lengthwise, right sides together, and stitch the bottom and side seams using a 1/4″ seam allowance. Turn, press, enjoy!

Completed Sunglass Case