
As we all adapt to a new world and daily routine – and spend a lot more time at home in an effort to stop the spread of COVID-19 – I will be sharing some simple projects to do at home over the next several weeks… all with a made-by-hand theme, including needlework, quilting, cooking, etc.
The projects are designed to make use of supplies you already have on hand – or, that you can hopefully find in local stores that are offering curbside pickup and mail order. On occasion, I will also offer a related pattern in the shop that provides more finishing options or other design details.
Do the projects on your own as a quiet break to process events and to simply focus on the project at hand… Connect with a friend or relative virtually to do a project together… Gather your family around the table to learn something new.
First up: the Soap Bubbles Dish Towel. This embroidery project features a white cotton dish towel embroidered with a simple, modern soap bubble pattern. Here’s the how-to:
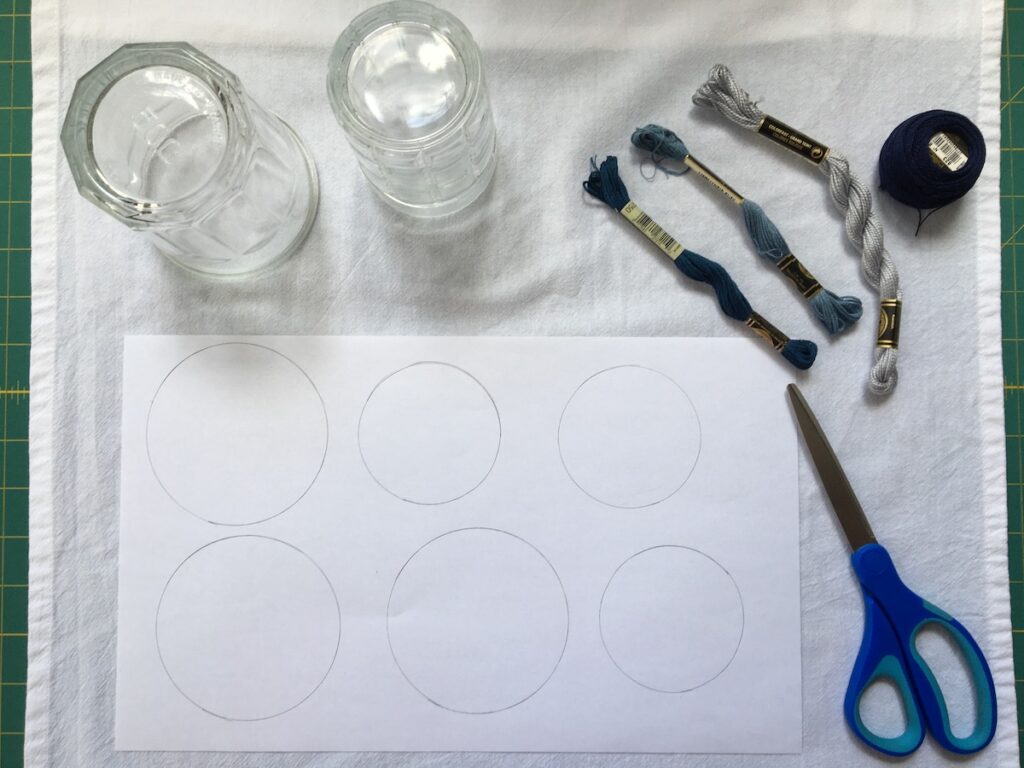
Step 1: Gather your supplies:
- White or other solid color 100% cotton dishtowel – brand new or one from your kitchen drawer – washed and pressed.
- Embroidery floss – 2 or more skeins. In the sample, I used DMC #3750 (dark blue) and DMC #931 (medium grey-blue). If kids are working on the project with you, consider letting each one stitch a circle in the color of their choice. (Please note- image below includes a sample of possible threads.)
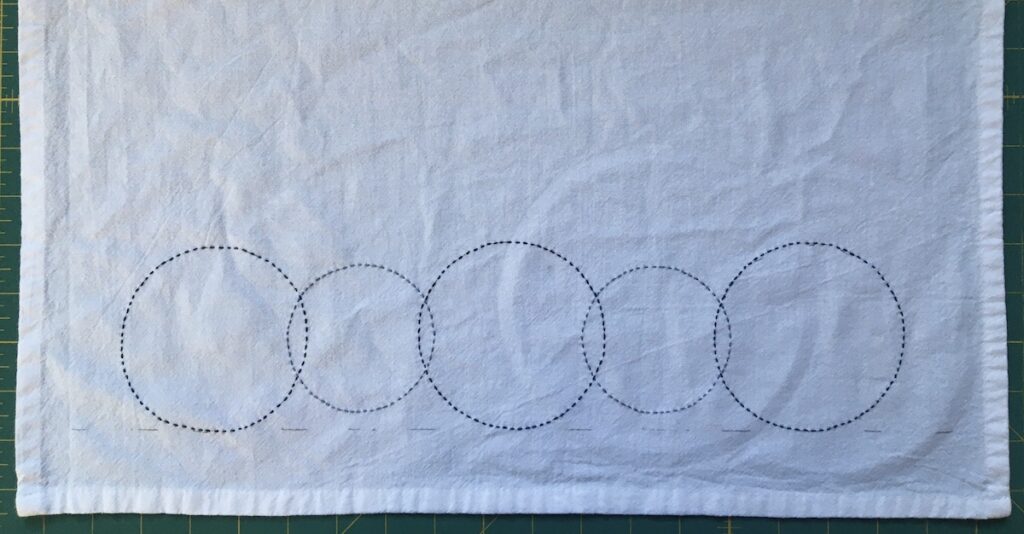
- Assorted glasses, spice jars, and canned goods to experiment w/ different circle sizes. The sample incorporates two sizes: 2-3/4″ and 3-1/2″.
- Pencil or Frixion, a thermo reactive pen from Pilot (markings disappear when you ironed) to mark the design on the towel. See more details below.
- Embroidery hoop – ideally, large enough to accommodate your largest circle. In the sample, I used a 6″ hoop.
- Embroidery needle – Size 5 – For this project, you can use a regular sewing needle as long as you can get 3 strands of embroidery floss threaded through the eye.
- Scissors
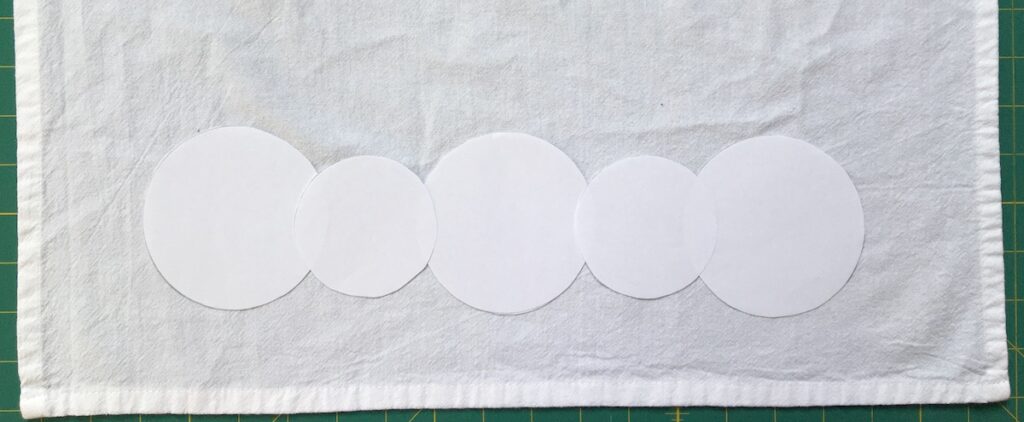
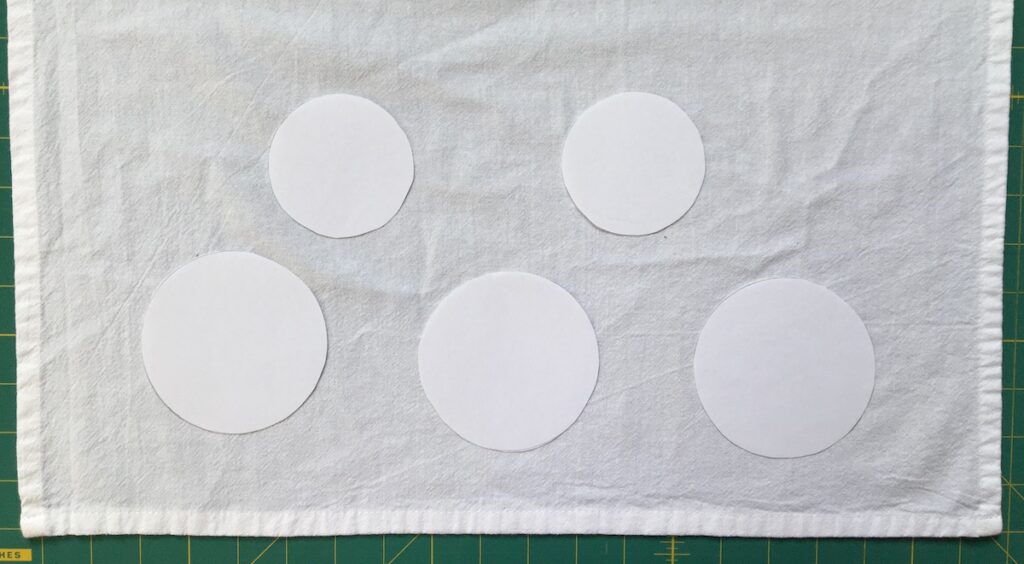
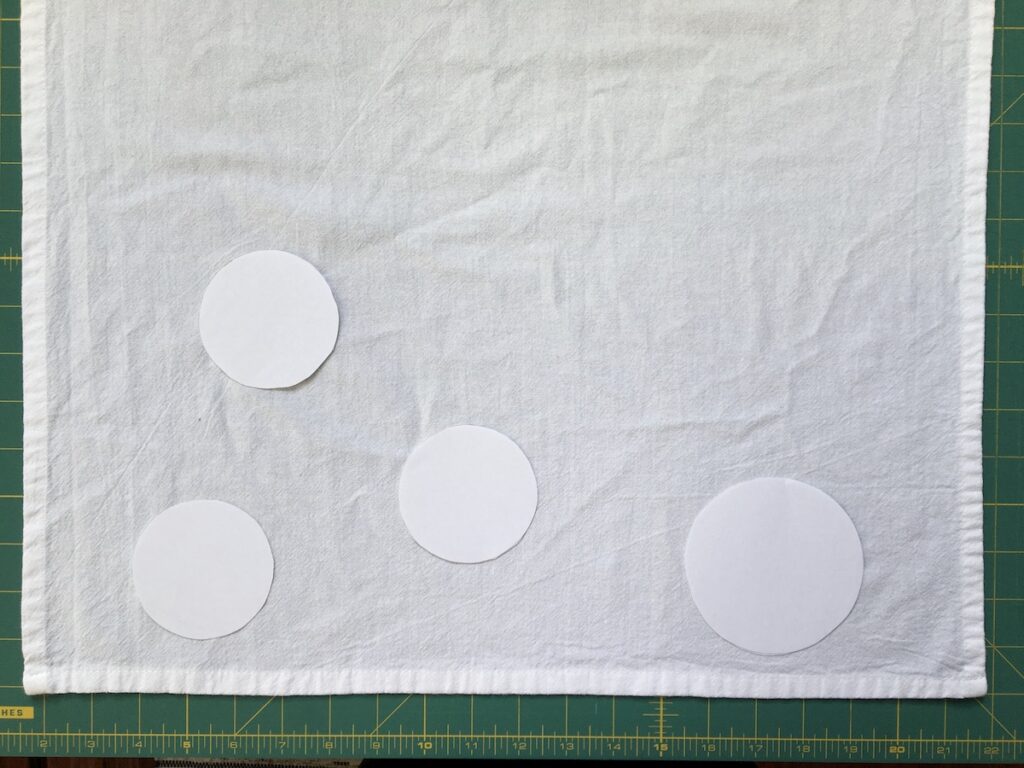
Step 2: Play with your circle sizes and layout:
- Decide on the stitching area – remember to keep it doable so that the dishtowel does not end up in a basket of unfinished projects.
- Look at how the circles interact with one another and look at the negative space, the area between circles. Are you going for a more formal look w/ bubbles in a specific pattern (like in the sample) or more informal design w/ circles placed somewhat randomly (like bubbles drifting up).
- Mark the center and make a rule line w/ masking tape if using a formal layout like in the sample.
- Trace the design when you are pleased with the layout, using a fabric marking pencil (available in most quilt shops); a lead pencil (press VERY lightly, and make a short dashed line that can be covered w/ stitches just in case the pencil marking does not wash out); or a Frixion thermo reactive pen by Pilot (the design disappears when you iron it). With all of these methods, I suggest using a dashed line rather than a solid line – it will be easier to see.
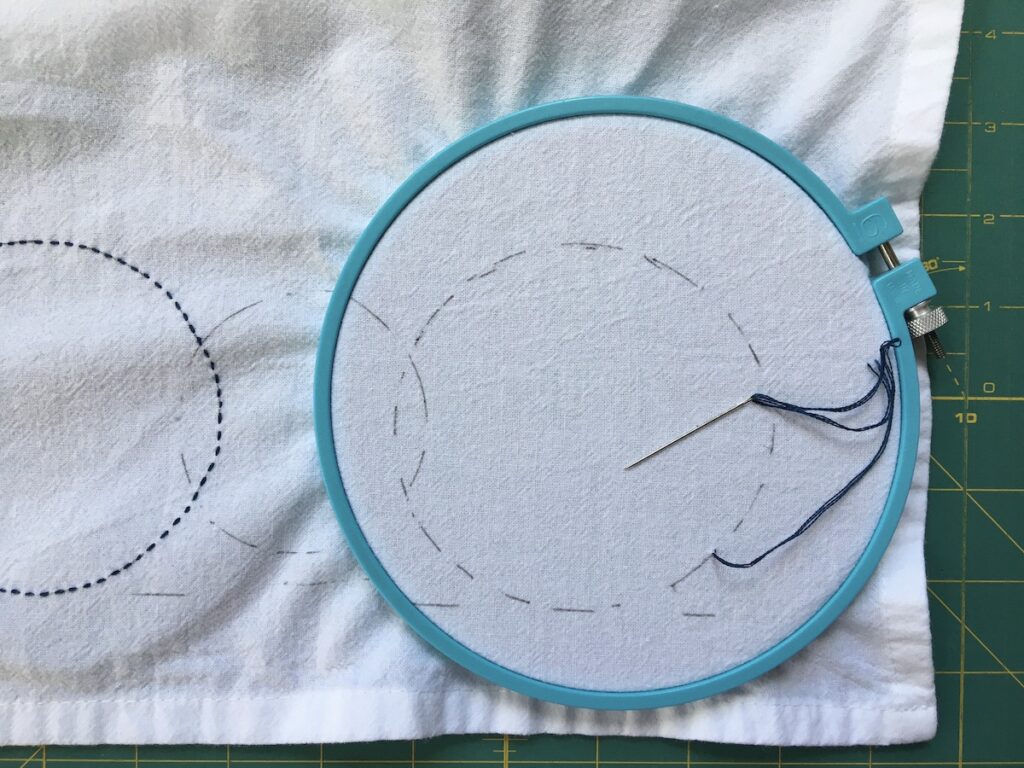
Step 3: Start stitching but first stake out a comfy place to work with good lighting:
- Stitch the soap bubbles using a running stitch – aka basting stitch. Thread your needle w/ 3 strands of embroidery floss cut to a length of about 14″. See the video on Facebook for other tips about working with floss. (Even if you’re not on Facebook, you should still be able to see the video.)
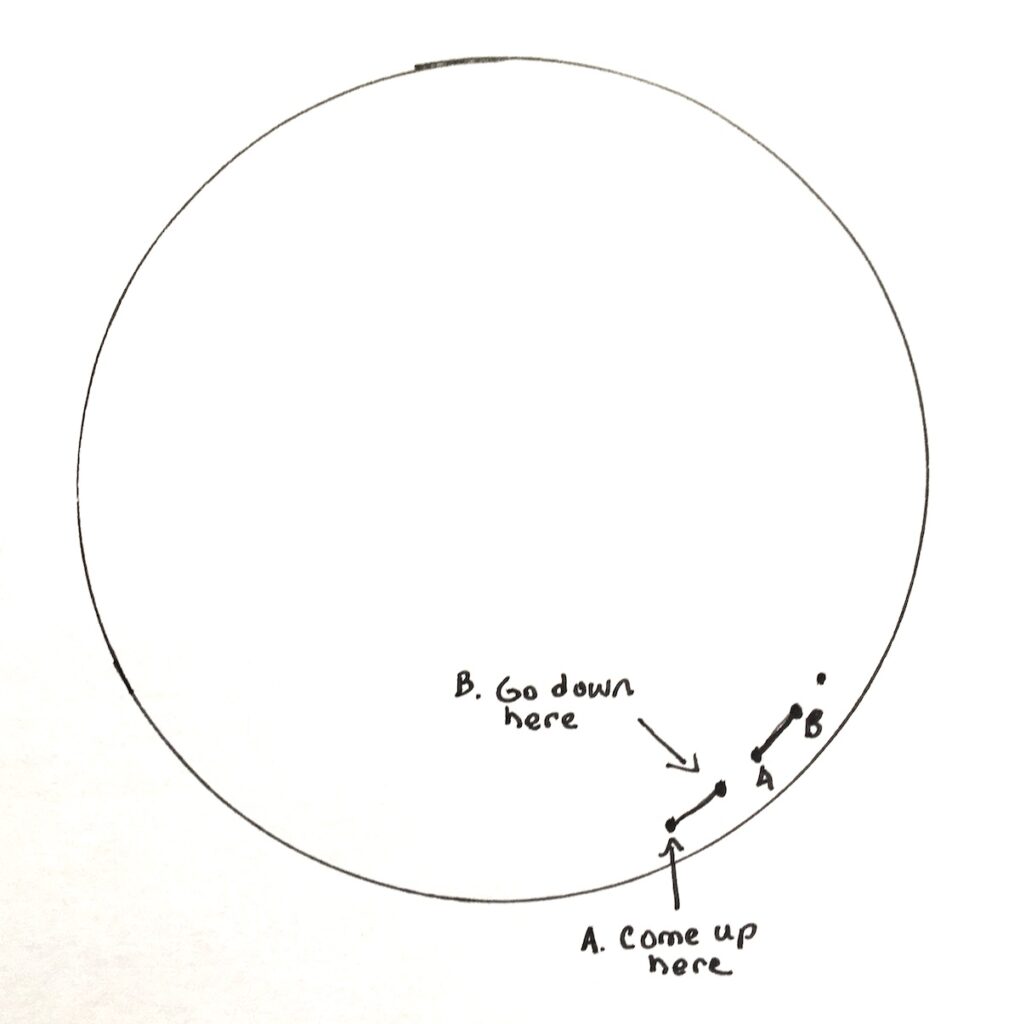
- Follow the sketch below for how to make the stitch – or watch the video on Facebook for a demo. Start with the circle that is closest to the center of your design.
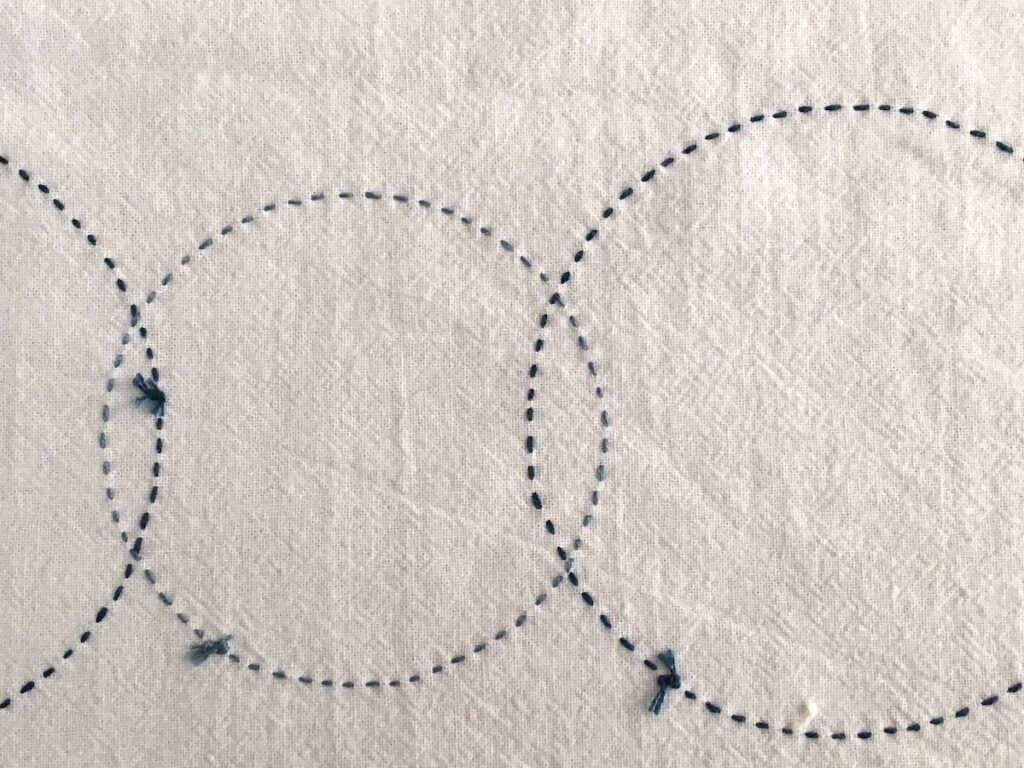
- Make stitches using a consistent stitch length and consistent spacing between stitches. The first circle might be a bit rough, but I suggest you keep stitching – this project is a record of your learning in a way. In the sample, there are about 7 stitches per inch.
- Start each circle in about the same spot to keep the back a bit more neat.
Post your finished Soap Bubble dishtowels on social media using the hashtags #ArtEveryday2020 and #togetherapart.
Stay up to date as new projects are posted by following us on Facebook!
Comments are closed for this article!