Go-To Hot Pad

The hand-quilted Go-To Hot Pad plays a supporting role in the kitchen but a big role in your daily routine – holding a hot bowl of oatmeal in the am or a steaming one-bowl meal in the pm. It goes hand-in-hand with your favorite bowl and favorite mug… A bit of art and a reminder to hit the “off” switch while you enjoy a meal.
Here’s the backstory on this project…
In college I bought a wok – the kind with a ring that sits on the burner and the wok sits down in in. Tucked in the box was a great recipe book that we still use and a blue and white hot pad with a cow in front of a fence printed on it along with the words “La Vache,” French for cow. The wok is now blackened from years of use and the hot pad is tattered, stained, and will likely not withstand another spin in the washer. The hot pad is still everyone’s go-to for holding a hot bowl of anything. Thus, this project was born – we need a replacement! Read on for the directions on making your own hot pad by hand or machine…

A few notes about the project:
- The beauty of this project is that you can probably find fabrics in your existing stash or clothing in the giveaway pile. If you need to buy new, check with your local fabric store.
- You are making a hot pad to hold a bowl you are eating from or to scoot under a hot dish or mug of coffee. You are not making a potholder to grab a hot dish from the oven.
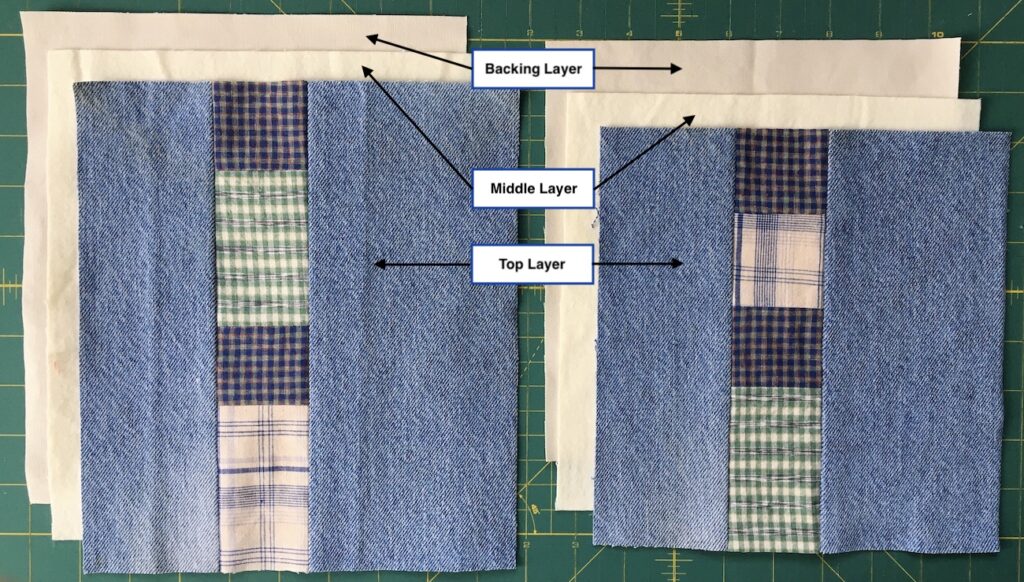
- A quilt is comprised of three layers – often referred to as the “quilt sandwich”: the top layer (aka the quilt front), the middle layer (composed of quilt batting or flannel to give your quilt a bit of loft), and the backing (often just as interesting as the front because of the pattern your hand-quilting stitches make).
Step 1: Gather your supplies:
- Sewing thread and needle if hand sewing; machine and thread if using
- Pearl cotton and needle with eye large enough to accommodate the pearl cotton for hand quilting. I used dark blue on the one hot pad (DMC #823, No. 8) and off white on the other (DMC Ecru, No. 12). A side note about pearl cotton: The higher the number, the finer the thread.
- Scissors
- Iron and ironing board
- Chop stick
- Thimble
- Needle threader (optional) to make it easier to thread needle
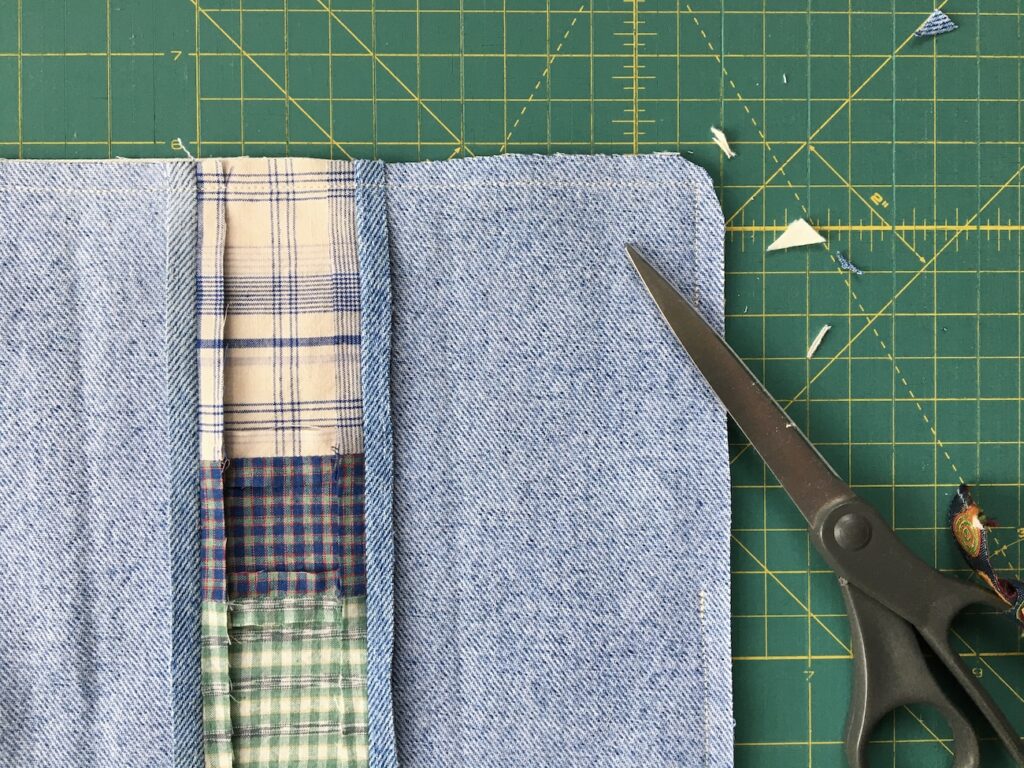
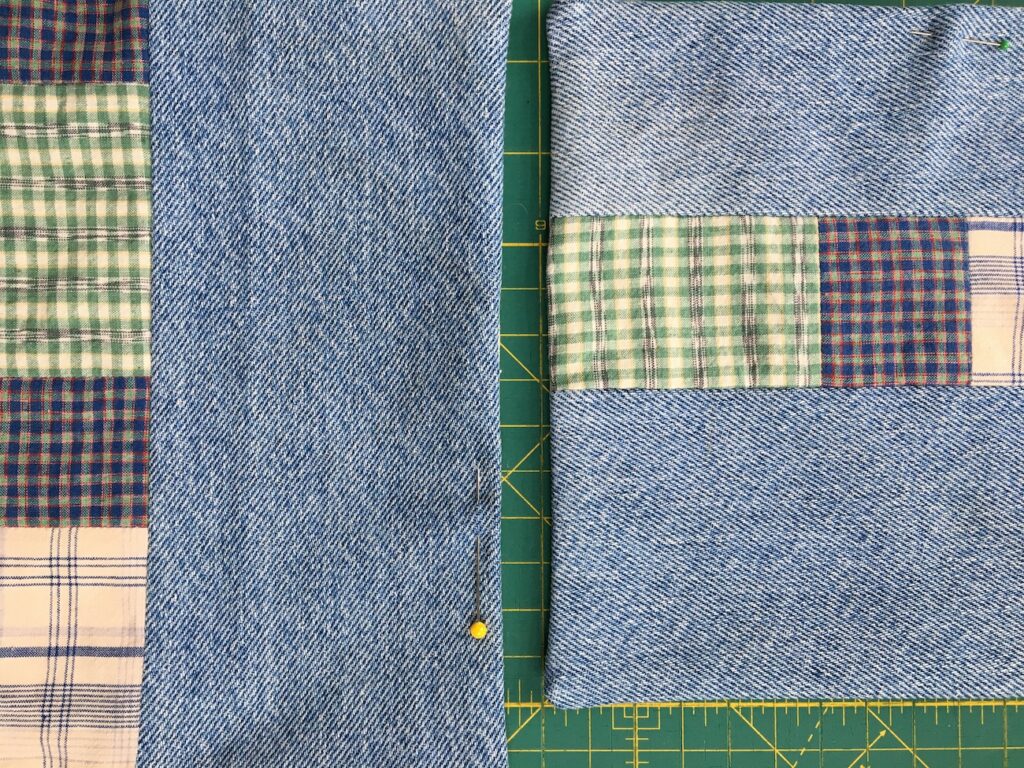
- Fabric scraps – For the top layer in the sample, I used old jeans (100% cotton only) to lend a worn-in look and feel right from the start along with scraps of plaid fabrics. For the middle layer, I used flannel; a scrap of quilt batting would also work. For the backing, I used a piece of 100% cotton duck, something to complement the rugged feel of the front. Read more about the amount you will need in Step 2.
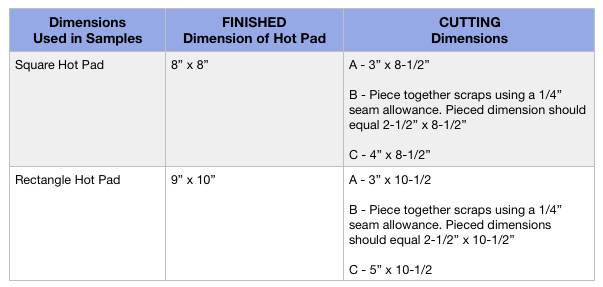
Step 2: Calculate how much fabric you need:
- First, do a bit of research – what size works best for your favorite bowl? Cut up paper towels and tape together, if nec, to determine the right finished size for your purposes, or stick with the dimensions used in the samples per the table and image below.
- If you’re calculating your own dimensions, allow 1/4″ seam allowances all the way around.

Step 3: Cut out the pieces. If you are repurposing clothing, trim away seams.

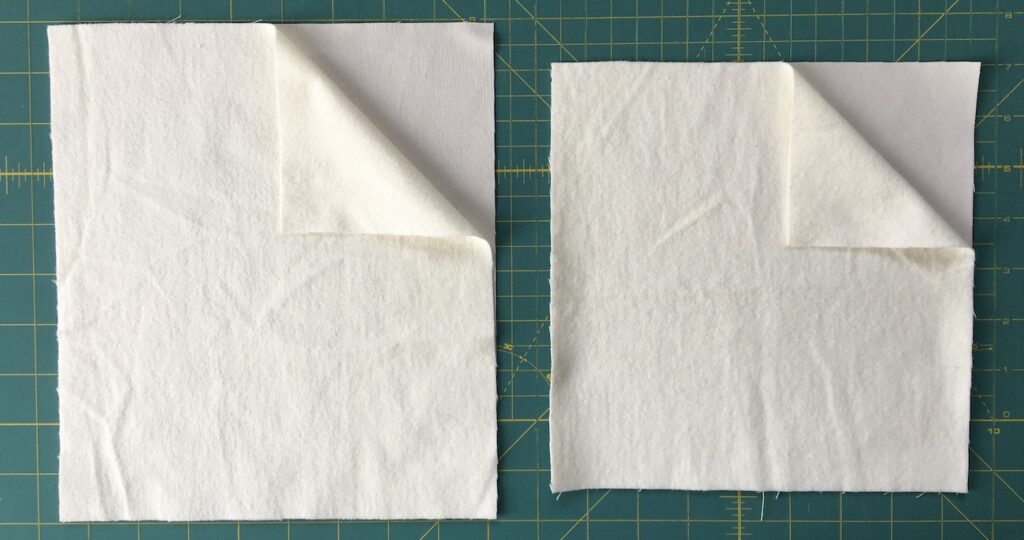
Step 4: Baste the middle layer (flannel or quilt batting) to the WRONG side of the fabric being used for the back. If basting by hand, use a running stitch – see the Soap Bubbles Dish Towel project for the how-to on this stitch.
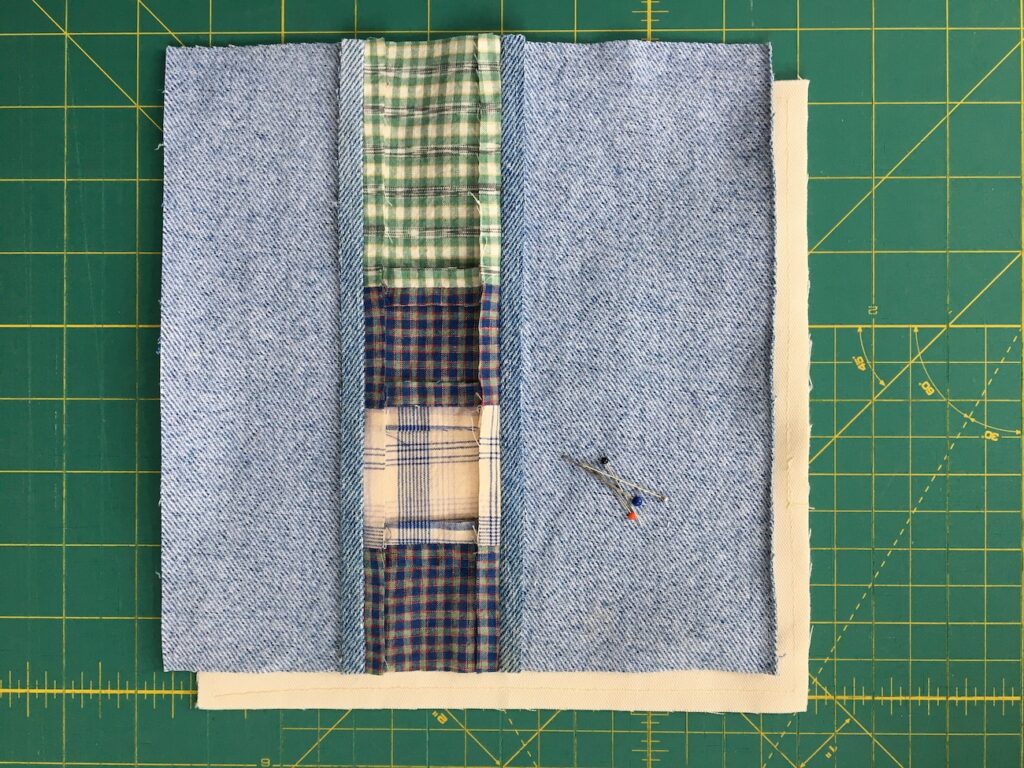
Step 5: Pin then stitch the quilt front to the quilt back-middle layer with right sides together and using a 1/4″ seam. If you are stitching by hand, use a backstitch. (NOTE: the right side of the top should be facing the right side of backing.) Leave a 3″ opening for turning right side out.
Step 6: Clip the corners to reduce bulk, then turn right-side out using a chop stick to poke corners out. Press flat.
Step 7: Pin, then stitch the opening closed using a hidden (aka invisible) stitch.
Step 8: Quilt using a design of your choice.
- If you are quilting near the seam lines, you can just eyeball the line without marking – just remember to stitch far enough out so that you are not going through multiple layers of fabric – perfectly doable, just hard on the fingers!
- If you want to mark a design on the surface (like the circular pattern in the sample), use an erasable or disappearing fabric marking pen available at most fabric stores, a Frixion thermo- reactive pen by Pilot, or white school chalk.
- In the samples, I used a running stitch- like the basting stitch in Step 4 above, but smaller, consistent stitches – about 7 stitches per inch – with consistent spacing between. See the Soap Bubbles Dish Towel project for more about this stitch.

Step 9: Use it! Here are some great looking recipes for one-bowl meals!
Post your finished Go-To Hot Pad on social media using the hashtags #ArtEveryday2020 and #togetherapart.
Stay up to date as new projects are posted by following us on Facebook!